Printing Checks
Moneyspire allows you to print checks directly from your computer, making bill paying a breeze. You will need pre-printed checks which you usually obtain from your bank. Moneyspire will print the date, amount, payee and memo on your checks. To use the check printing feature, you will first need to make which transactions you wish to print as checks; To do this, you select the Print Check option in the Number field when adding a transaction. Then select the File > Print Checks menu option, which will print out the checks, and then automatically insert the paper check's number into the Number field of the transaction. Here are the available options:
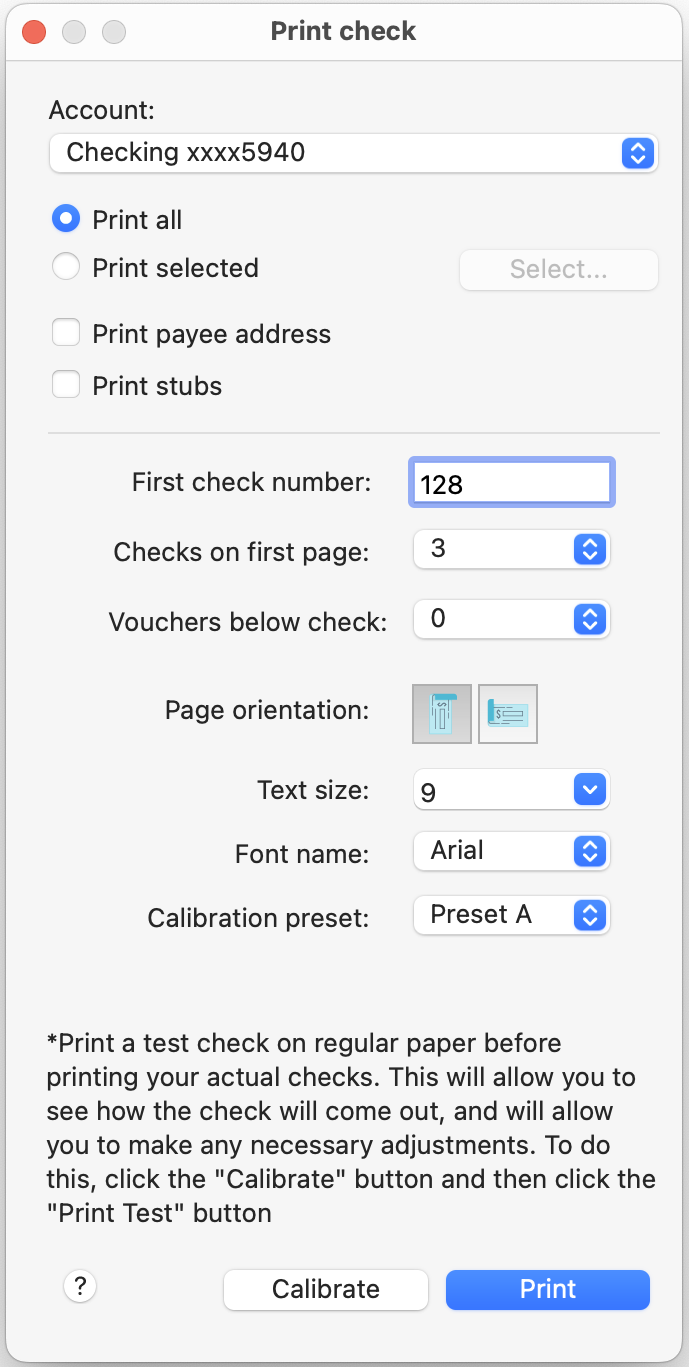
Account
The account you want to print the checks from.
Print all checks
Select this option to print all of the checks in the account.
Print selected checks
Select this option to choose which checks to print.
Print payee addresses
Prints the payee's address on the check (if available). You can specify the payee's address from the Payees screen.
First check number
This is the number of the first check in your printer. This number will be automatically incremented for every check printed, and will be inserted into the printed transaction's Number field.
Checks on first page
This is the number of checks printed per page. Usually this will be one, unless you have a sheet of checks, in which case you can choose either 2 or 3 checks per page.
Vouchers below check
This is the number of vouchers to print below a check.
Page orientation
This is the position that the check will be printed in (i.e. Portrait or Landscape),
depending on the way you position the check paper in your printer.
Text size
The font size used when printing checks.
Font name
The font used when printing checks.
Calibration preset
You can calibrate two different check presets (for example, if you need to print both personal wallet checks and larger business checks).
Customizing check printing options
You can customize the check printing options to match your specific check paper by clicking the Calibrate button. Just click and drag the fields until they match the position of the fields on your check paper. In addition, you can also specify the bottom check margin if you have more than one check per sheet. All check measurements are in centimeters (cm).
*It is highly recommended that you print a test check on regular paper before printing your actual checks. For example, you may need to adjust the positions of the various items on the check, or you may need to adjust the page orientation of the printed check. This will allow you to see how the check will come out, and will allow you to make any necessary adjustments. To do this, click the "Calibrate" button and then click the "Print Test" button.