Invoices
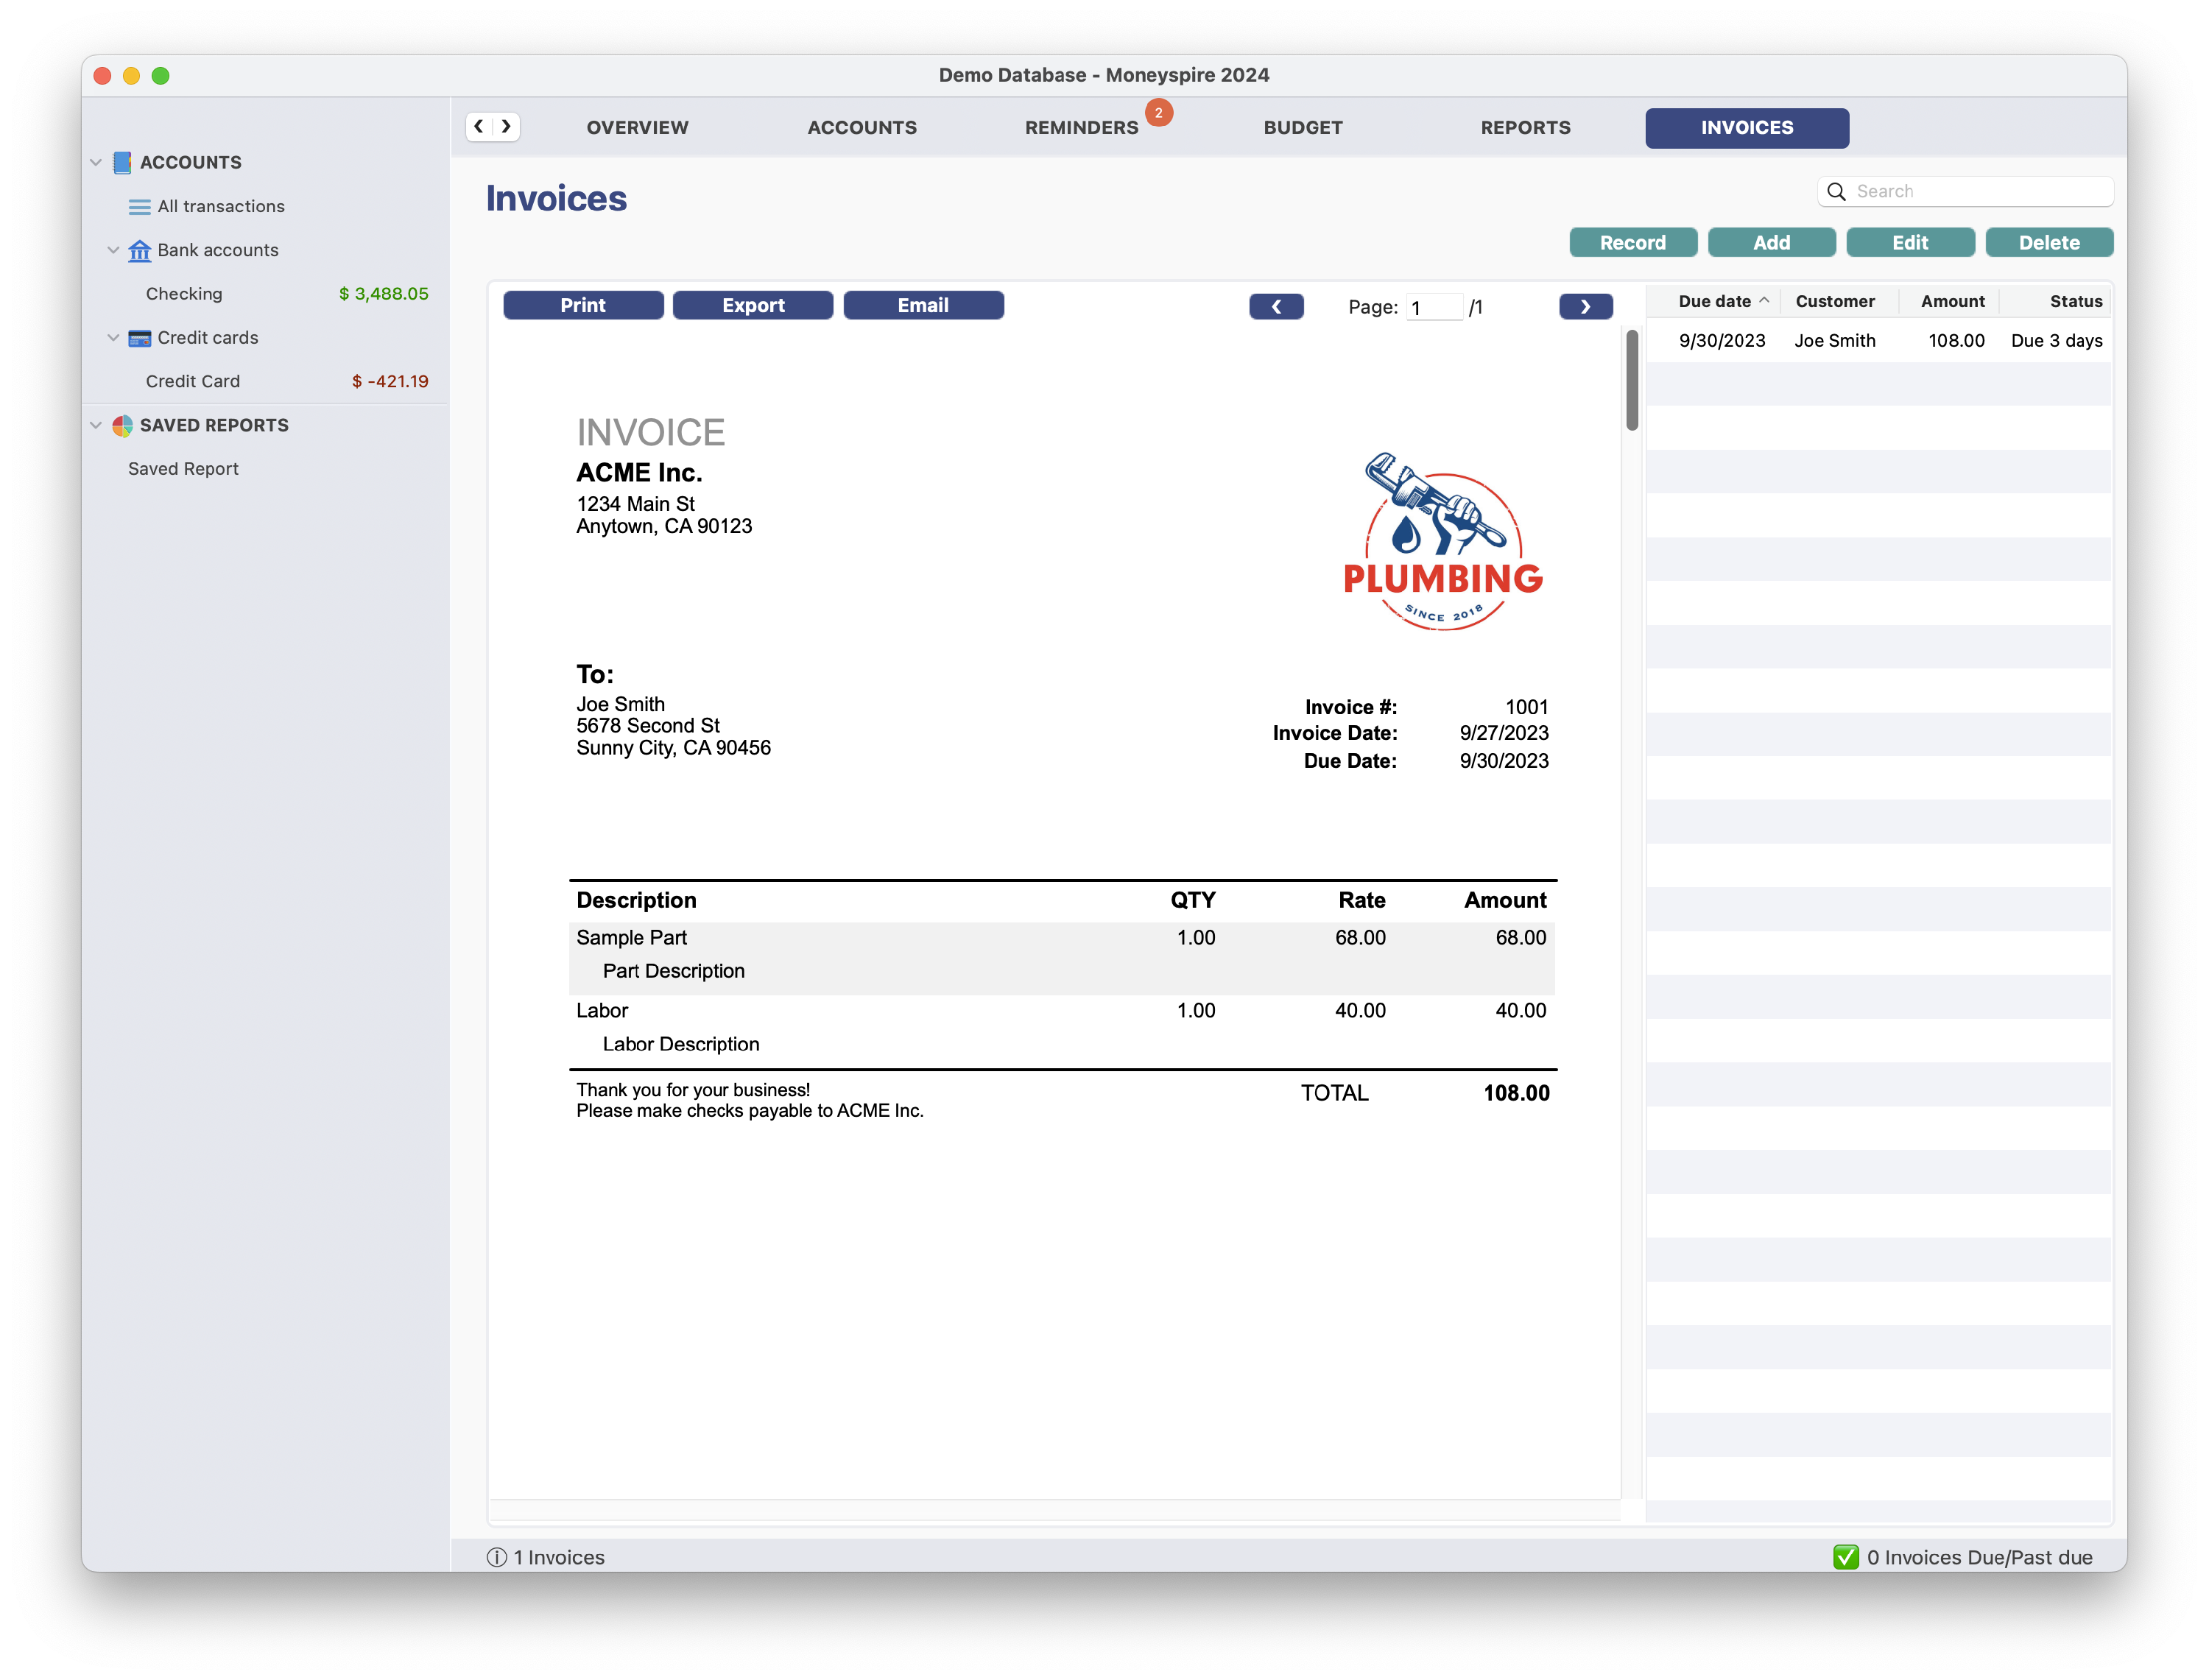
Moneyspire allows you to create and manage invoices (in the Moneyspire Pro version). To add an invoice, click on the Invoices tab menu option and then click the Add button. To record a payment for an invoice select the invoice from the list and click the Record button. You may also print invoices or export to PDF. Also, you can email invoices and be notified when the recipient views the invoice.
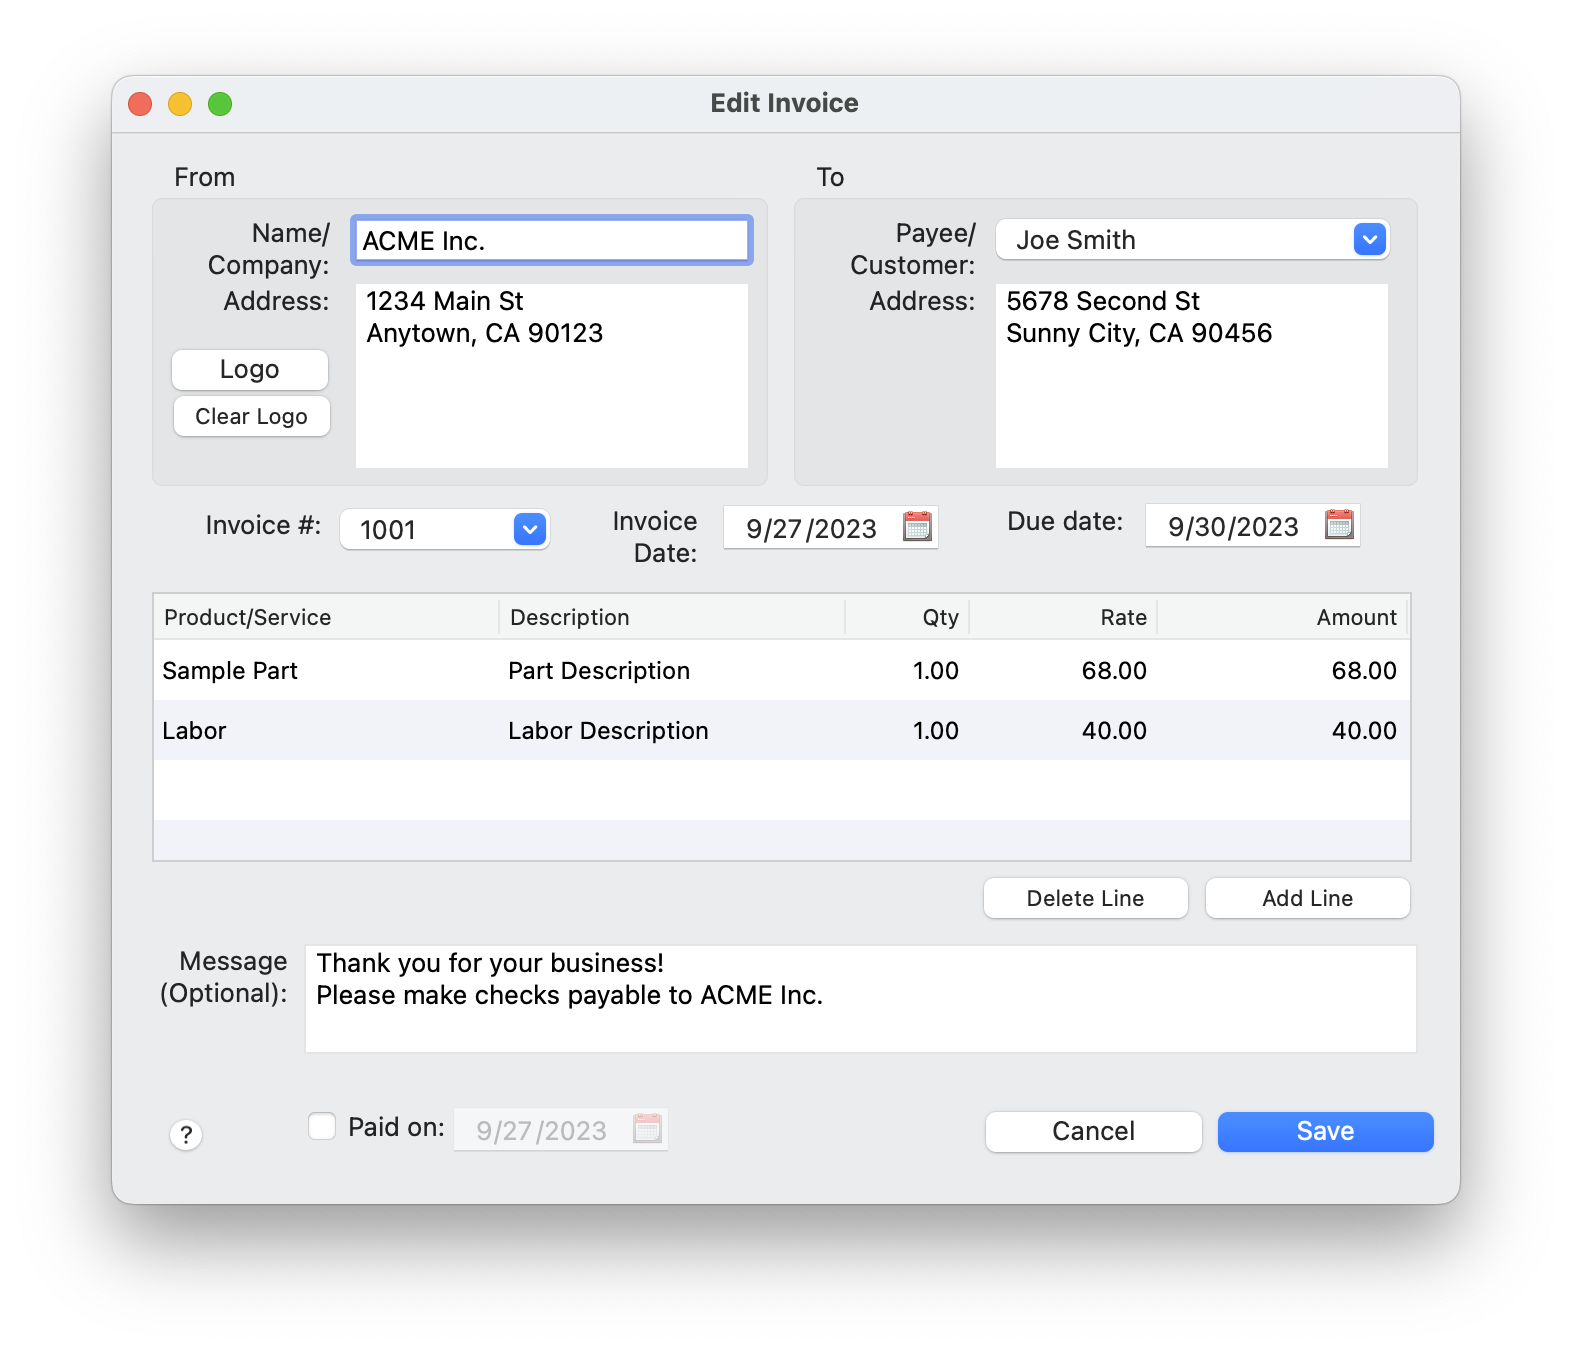
Below is an explanation of the fields you have to fill in:
Name/Company
This your name or the name of your company.
Address
This is your address or the address of your company.
Logo
Click this button to select a logo image for the invoice. The image size should be 150×150 (or a similar proportion).
Payee/Customer
This is the name of your customer.
Address
This is the address of your customer.
Invoice #
This is the invoice number. You can click on the drop down menu and select Next Invoice #.
Invoice Date
This is the date of the invoice.
Due Date
This is the date that the invoice is due.
Product/Service
This is the name of the product or service.
Description
This is the description of the product or service.
Qty (Quantity)
This is the quantity of the product or service.
Rate
This is the price of the product or service.
Amount
This is the total of the line item.
Delete Line
Click this button to delete a selected line.
Add Line
Click this button to add a line to the invoice.
Message (Optional)
This is where you can add a custom message to the invoice, such as your payment details and a thank you note.
Paid on:
This is the date that the invoice was paid off.